
Host & Network Penetration Testing Network-Based Attacks CTF 1 — Walkthrough

Last updated: July 07, 2025
Hi everyone! In this article, I will solve the Host & Network Penetration Testing: Network-Based Attacks CTF 1 (eJPTv2). So sit back and read!
Flag 1: What is the URL accessed by the infected user that returned a 200 OK response code
We have ‘test.pcap’ file, open it in wireshark as all the flags will be in there! and we have to find the URL accessed by the infected user.
Open ‘test.pcap’ file
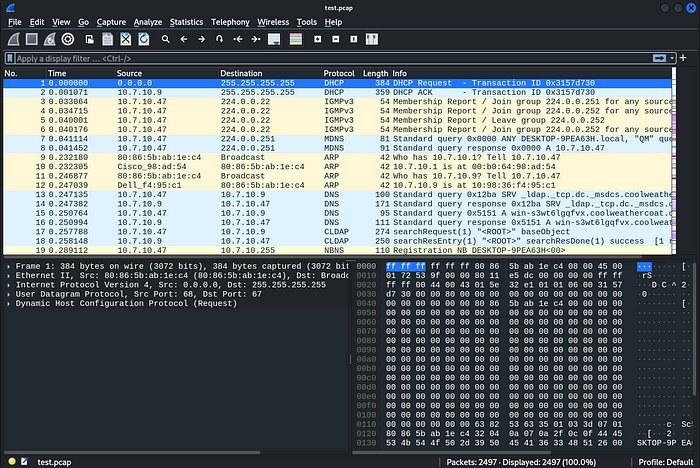
As in the question ‘200 OK’ Response code is only in HTTP response, so first add a filter: ‘http’

We have to focus on the HTTP response, so there are only two responses of ‘200 OK’. So, select the second packet
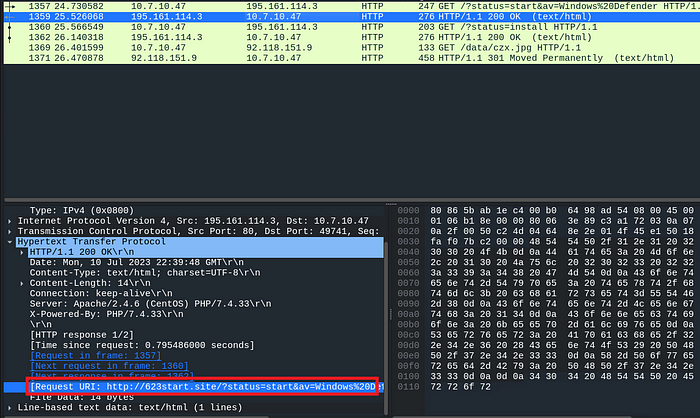
we have to find the URL accessed by the user, so under ‘Hypertext Transfer Protocol’, there is the field ‘Request URI: http://623start.site’
FLAG1 is: 623start.site
Flag 2: What is the IP address, MAC address of the infected Windows client?
Now we have to find the IP address and MAC address of the infected Windows client, Before we have looked the HTTP response from the server, so now from the HTTP request we can confirm that the infected client is requesting it, we only need to note the source IP and source MAC address.
Select the packet of the HTTP GET Method
The filter remains the same!
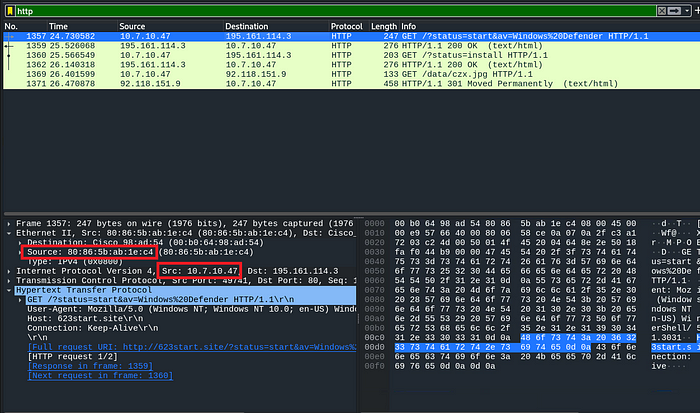
Additionally, in the HTTP Request packet, we can confirm from the user-agent that it is the infected Windows client.
Note the source IP and source MAC address
FLAG 2: 10.7.10.47, 80:86:5b:ab:1e:c4
NOTE: IP and MAC address will be in comma-separated
Flag 3: Which Wireshark filter can you use to determine the victim’s hostname from NetBIOS Name Service traffic, and what is the detected hostname for this malware infection?
We have to give two answers, First “Which Wireshark filter can you use to determine the victim’s hostname from NetBIOS Name Service traffic?” and Second “What is the detected hostname for this malware infection?”
To determine a victim’s hostname using ‘NetBIOS Name service’ traffic in Wireshark, you can apply the filter ‘nbns’

Then select the first packet, under ‘NetBIOS Name Service’ then under ‘Queries’, there is the hostname!
FLAG 3: nbns, DESKTOP-9PEA63H
NOTE: nbns and DESKTOP-9PEA63H will be in comma-separated
Flag 4: Which user got infected and ran the mystery_file.ps1 PowerShell script?
Now we have to identify the username that ran the mystery_file.ps1 script, for this we have to search by string
Enter Ctrl + F to search
Then change the ‘display filter’ to string
Select the packet bytes
Enter ‘mystery_file.ps1’ in the Search filter and then find

Wireshark will automatically select that specific Packet
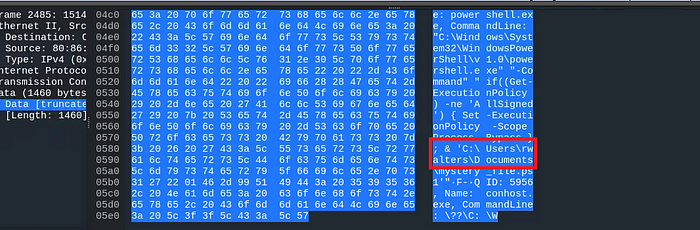
Note that in the ‘bytes section’ there is the script ‘mystery_file.ps1’, and we can also note that there is a path also: C:/users/rwalters
It means ‘rwalters’ is the user who ran the script, so it is the flag!
Flag 4: rwalters
Flag 5: What User-Agent string indicates the traffic generated by a PowerShell script?
So now we have to identify the user-agent that initiated that PowerShell script, so for that:
Enter Ctrl + F to search
Then change the ‘display filter’ to string
Select the ‘packet details’
Enter ‘PowerShell’ in the Search filter and then find
The packet will be highlighted, so under “Hypertext Transfer Protocol,” the user agent gives: ‘WindowsPowerShell’ that originates the PowerShell traffic.
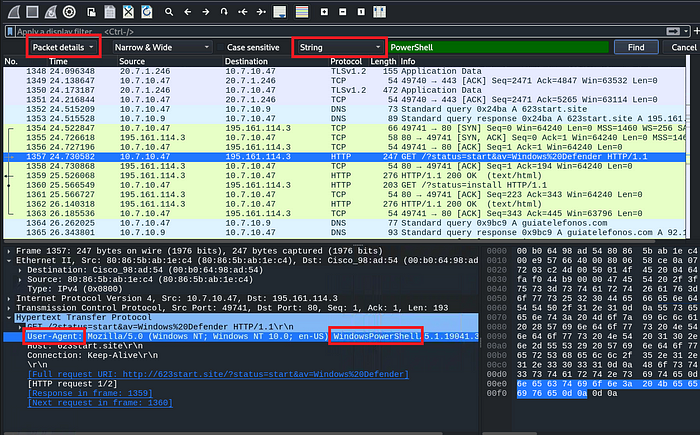
FLAG 5: WindowsPowerShell
Flag 6: Which wallet extension ID is associated with the Coinbase wallet?
Now we have to identify the ID of the Coinbase wallet, likely the cryptocurrency
Enter Ctrl + F to search
Then change the ‘display filter’ to string
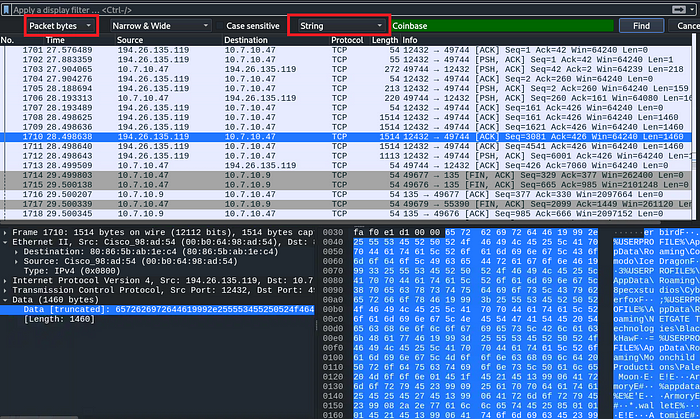
Select the packet bytes
Enter ‘Coinbase’ in the Search filter and then find
The packet will be highlighted
Right-click on the right side where bytes are seen and copy as printable text.
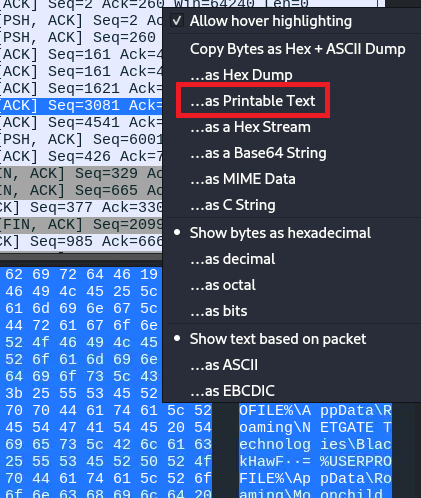
The Text is given below:
[«Ä°dTEܲ¤$°Âw
/0ÂPEº]¥kPúðáÑerbirdF.%USERPROFILE%\AppData\Roaming\Comodo\IceDragonF3%USERPROFILE%\AppData\Roaming\8pecxstudios\CyberfoxF;%USERPROFILE%\AppData\Roaming\NETGATE Technologies\BlackHawF=%USERPROFILE%\AppData\Roaming\Moonchild Productions\Pale MoonEE!EArmoryE# %appdata%E%E'EArmoryE#*.walletE% E!EAtomicE# %appdata%E%E'EatomicE#*E%E!EBinanceE# %appdata%E%E'EBinanceE#
*app-store*E% E!ECoinomiE#%localappdata%E%E'ECoinomi\Coinomi\CacheE#*E%E'ECoinomi\Coinomi\dbE#*E%E'ECoinomi\Coinomi\walletsE#*E%E!EElectrumE# %appdata%E%E'EElectrum\walletsE#*E% E!EEthereumE# %appdata%E%E'EEthereum\walletsE#*E% E!EExodusE# %appdata%E%E'EExodus\exodus.walletE#*E% E'EExodusE#*.jsonE% E!EGuardaE# %appdata%E%E'EGuardaE#*E%E!EJaxxE# %appdata%E%E'Ecom.liberty.jaxxE#*E%E!EMoneroE#%userprofile%\DocumentsE%E'EMonero\walletsE#*E% E)¥ffnbelfdoeiohenkjibnmadjiehjhajb|YoroiWallet
ibnejdfjmmkpcnlpebklmnkoeoihofec|Tronlink
jbdaocneiiinmjbjlgalhcelgbejmnid|NiftyWallet
nkbihfbeogaeaoehlefnkodbefgpgknn|Metamask
afbcbjpbpfadlkmhmclhkeeodmamcflc|MathWallet
hnfanknocfeofbddgcijnmhnfnkdnaad|Coinbase
fhbohimaelbohpjbbldcngcnapndodjp|BinanceChain
odbfpeeihdkbihmopkbjmoonfanlbfcl|BraveWallet
hpglfhgfnhbgpjdenjgmdgoeiappafln|GuardaWallet
blnieiiffboillknjnepogjhkgnoapac|EqualWallet
cjelfplplebdjjenllpjcblmjkfcffne|JaxxxLiberty
Fihkakfo
[«Ä°dTEܲ¤$°Âw
/0ÂPEº]¥kPúðáÑerbirdF.%USERPROFILE%\AppData\Roaming\Comodo\IceDragonF3%USERPROFILE%\AppData\Roaming\8pecxstudios\CyberfoxF;%U
So we have to find the extension ID of the CoinBase wallet, as we can see we have different wallets and their IDs, the ID of the Coinbase wallet is the flag:
FLAG 6: hnfanknocfeofbddgcijnmhnfnkdnaad
And there you go! It was pretty easy. See you in the next Challenge!
Good luck hackers